上次尝试了在Unbuntu下的LAMP部署了WAf防火墙,其文章如下:
这次折腾了下就继续研究了基于LNMP环境来部署Modsecurity,结合Nginx给你的WEB提供一层防火墙
本次演示的博主的系统环境:
- 系统版本:CentOS Linux release 7.9.2009 (Core)
- Kernel:3.10.0-1160.11.1.el7.x86_64
- Nginx版本(编译安装):nginx version: nginx/1.19.6
- MySQL版本(编译安装):mysql Ver 14.14 Distrib 5.6.50
- PHP版本(编译安装):PHP 7.3.26
下面教程开始
安装教程
下面的一切操作皆是root用户进行
1、安装所需的依赖
yum install -y git pcre pcre-devel openssl openssl-devel libtool libtool-ltdl-devel gcc gcc-c++ autoconf automake geoip geoip-devel libcurl libcurl-devel yajl yajl-devel lmdb-devel ssdeep-devel lua-devel unzip2、编译动态库并安装Modsecurity
git clone https://github.com/SpiderLabs/ModSecurity
cd ModSecurity
git checkout -b v3/master origin/v3/master
git submodule init
git submodule update
sh build.sh
./configure
make
make install
过程会比较慢,耐心等待即可
3、生成nginx和Modsecurity连接的动态模块
此处需要你当前已安装版本的Nginx源码编译生成,可从Nginx官网下载,链接:http://nginx.org/download/
查看nginx版本并下载源码及解压命令(若您以上述操作安装的Nginx且还保留了当前源码可不必再下载一遍):
cd ~
/usr/local/nginx/sbin/nginx -V
#此时我的版本为:nginx version: nginx/1.19.6,故下载1.19.6版本的源码,若你的Nginx是编译安装的,最好也记住编译安装的指令

wget http://nginx.org/download/nginx-1.19.6.tar.gz
tar -zxvf nginx-1.19.6.tar.gz
上面源码下载好后进行接下来操作
cd ~
git clone https://github.com/SpiderLabs/ModSecurity-nginx.git modsecurity-nginx
cd nginx-1.19.6

# 此处的编译命令为博主的命令,不同的安装方式不同,按需编译,也可直接使用命令./configure --add-dynamic-module=../modsecurity-nginx 参数添加模块编译即可
./configure --prefix=/usr/local/nginx --user=www --group=www --with-pcre \
 --with-http_v2_module --with-stream --with-stream_ssl_module \
 --with-stream_ssl_preread_module --with-http_stub_status_module \
 --with-http_ssl_module --with-http_image_filter_module --with-http_gzip_static_module \
 --with-http_gunzip_module --with-ipv6 --with-http_sub_module --with-http_flv_module \
 --with-http_addition_module --with-http_realip_module --with-http_mp4_module \
 --with-ld-opt=-Wl,-E --with-cc-opt=-Wno-error --with-http_dav_module \
 --add-dynamic-module=../modsecurity-nginx

make modules
make
make install
4、下载规则集,移动到Nginx配置规则中
OWASP ModSecurity 核心规则集 (CRS) 是一组通用攻击检测规则,用于 ModSecurity 或兼容的 Web 应用程序防火墙。CRS 旨在保护 Web 应用程序免受广泛的攻击,包括 OWASP 前十名,同时将错误警报降至最低。原规则仓库现在已迁移至新仓库:https://github.com/coreruleset/coreruleset,且原规则仓库现已不在更新,仅作为保留,下方教程基于新仓库进行配置!
cd ~
git clone https://github.com/coreruleset/coreruleset
cp -a coreruleset  /usr/local/nginx/conf/
cd /usr/local/nginx/conf/coreruleset
cp crs-setup.conf.example  crs-setup.conf

sed -ie 's/SecDefaultAction "phase:1,log,auditlog,pass"/#SecDefaultAction "phase:1,log,auditlog,pass"/g' crs-setup.conf

sed -ie 's/SecDefaultAction "phase:2,log,auditlog,pass"/#SecDefaultAction "phase:2,log,auditlog,pass"/g' crs-setup.conf

sed -ie 's/# SecDefaultAction "phase:1,log,auditlog,deny,status:403"/SecDefaultAction "phase:1,log,auditlog,deny,status:403"/g' crs-setup.conf

sed -ie 's/# SecDefaultAction "phase:2,log,auditlog,deny,status:403"/SecDefaultAction "phase:2,log,auditlog,deny,status:403"/g' crs-setup.conf
5、将Modsecurity的配置文件移动到Nginx配置文件中
cd ~/ModSecurity
cp modsecurity.conf-recommended /usr/local/nginx/conf/modsecurity.conf

vim /usr/local/nginx/conf/modsecurity.conf

# 修改内容为如下
SecRuleEngine On

cp unicode.mapping  /usr/local/nginx/conf/
6、在Nginx配置文件中,创建modsec_includes.conf并写入相关配置
cd /usr/local/nginx/conf/

vim modsec_includes.conf

#写入如下内容
include modsecurity.conf
include coreruleset/crs-setup.conf
include coreruleset/rules/*.conf
7、修改Nginx配置文件nginx.conf
vim /usr/local/nginx/conf/nginx.conf

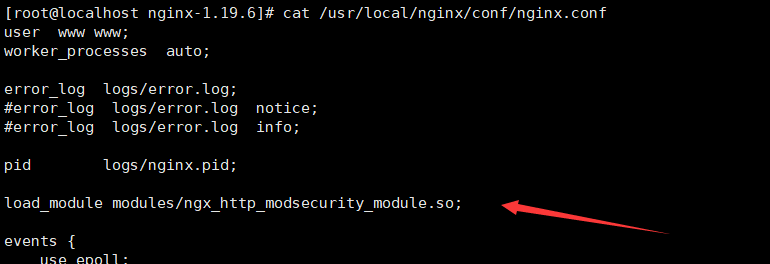
#将以下load_module指令添加到events上面(勿添加到http主体中):
load_module modules/ngx_http_modsecurity_module.so;

若相关站点开启ModSecurity,则在对应站点的server段内配置相关加载配置,如下:
#将其中修改为如下:
server {
        listen       80;
        server_name  localhost;
        root   html;

        location / {
            # 该站点开启防火墙
            modsecurity on;
            modsecurity_rules_file /usr/local/nginx/conf/modsec_includes.conf;
            index  index.html index.htm;
        }
...
}
8、验证配置文件是否正确
/usr/local/nginx/sbin/nginx -t显示syntax is ok即可
此处若显示如下错误:
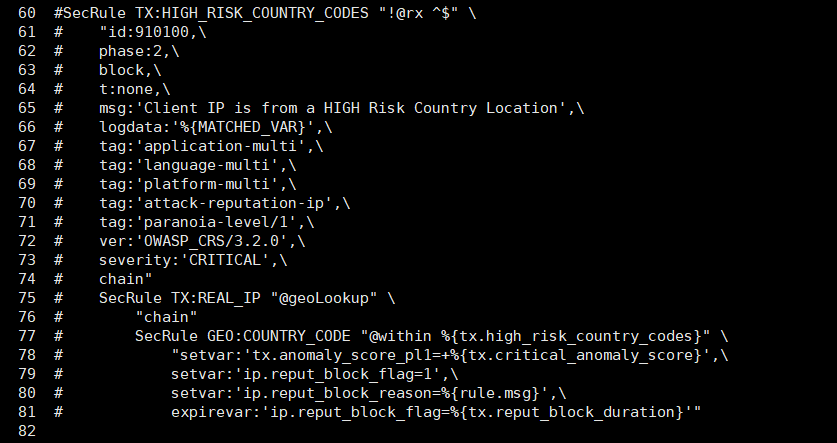
nginx: [emerg] "modsecurity_rules_file" directive Rules error. File: /usr/local/nginx/conf/coreruleset/rules/REQUEST-910-IP-REPUTATION.conf. Line: 75. Column: 22. This version of ModSecurity was not compiled with GeoIP or MaxMind support. in /usr/local/nginx/vhost/0.default.conf:9
nginx: configuration file /usr/local/nginx/conf/nginx.conf test failed
因为没有编译 GeoIP 。如果暂时不需要此功能,用#号注释/usr/local/nginx/conf/coreruleset/rules/REQUEST-910-IP-REPUTATION.conf文件的第60-81行的部分

9、重载配置文件或重启Nginx并测试
nginx -s reload  # 该命令为重载配置文件
systemctl restart nginx # 该命令为重启nginx,该命令与上述命令二选一执行
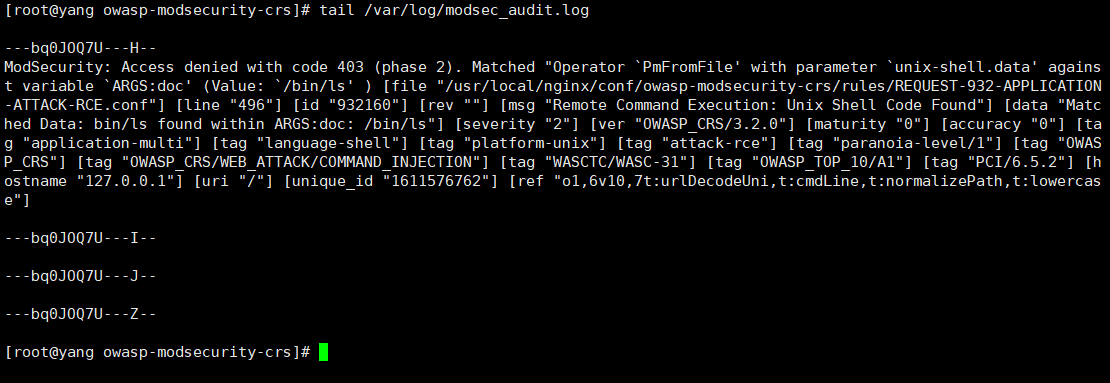
curl localhost/?doc=/bin/ls
返回403错误,配置成功
10、检查审计日志
tail /var/log/modsec_audit.log
成功记录

2 条评论
学到了